Key Concepts of n8n – Part 1: Introduction to n8n Workflows

Table of Contents
What is a Workflow in n8n?
A workflow is the foundation of automation in n8n. It defines a sequence of steps (called nodes) that process and transfer data to complete a task automatically.
Think of it like a digital assembly line:
- Input → Data enters (e.g., from an API, manual trigger, or schedule).
- Processing → Nodes modify, filter, or analyze the data.
- Output → The result is sent to another app, database, or notification system.
Unlike rigid automation tools, n8n workflows are flexible, customizable, and self-hostable, making them ideal for developers and non-coders alike.
How Do n8n Workflows Work?
1. Nodes
- Building blocks that perform actions (e.g., fetch data, send emails, run code).
- Each node processes data and passes it to the next node via connections.
2. Connections (Edges)
- Define the order of execution (which node runs next).
- Data flows as JSON, making it easy to manipulate.
3. Triggers
- Determine how and when the workflow starts:
- Manual trigger (user clicks "Execute Workflow").
- Scheduled trigger (e.g., run every day at 9 AM).
- Webhook trigger (real-time HTTP requests).
🚀 Simple Workflow Example: Send a Welcome Email
Let’s build an easy workflow that sends a welcome email when you click a button. This is the perfect first workflow to understand how n8n nodes work together! If you’re new to n8n, start by reading What is n8n? for an overview of its core features.
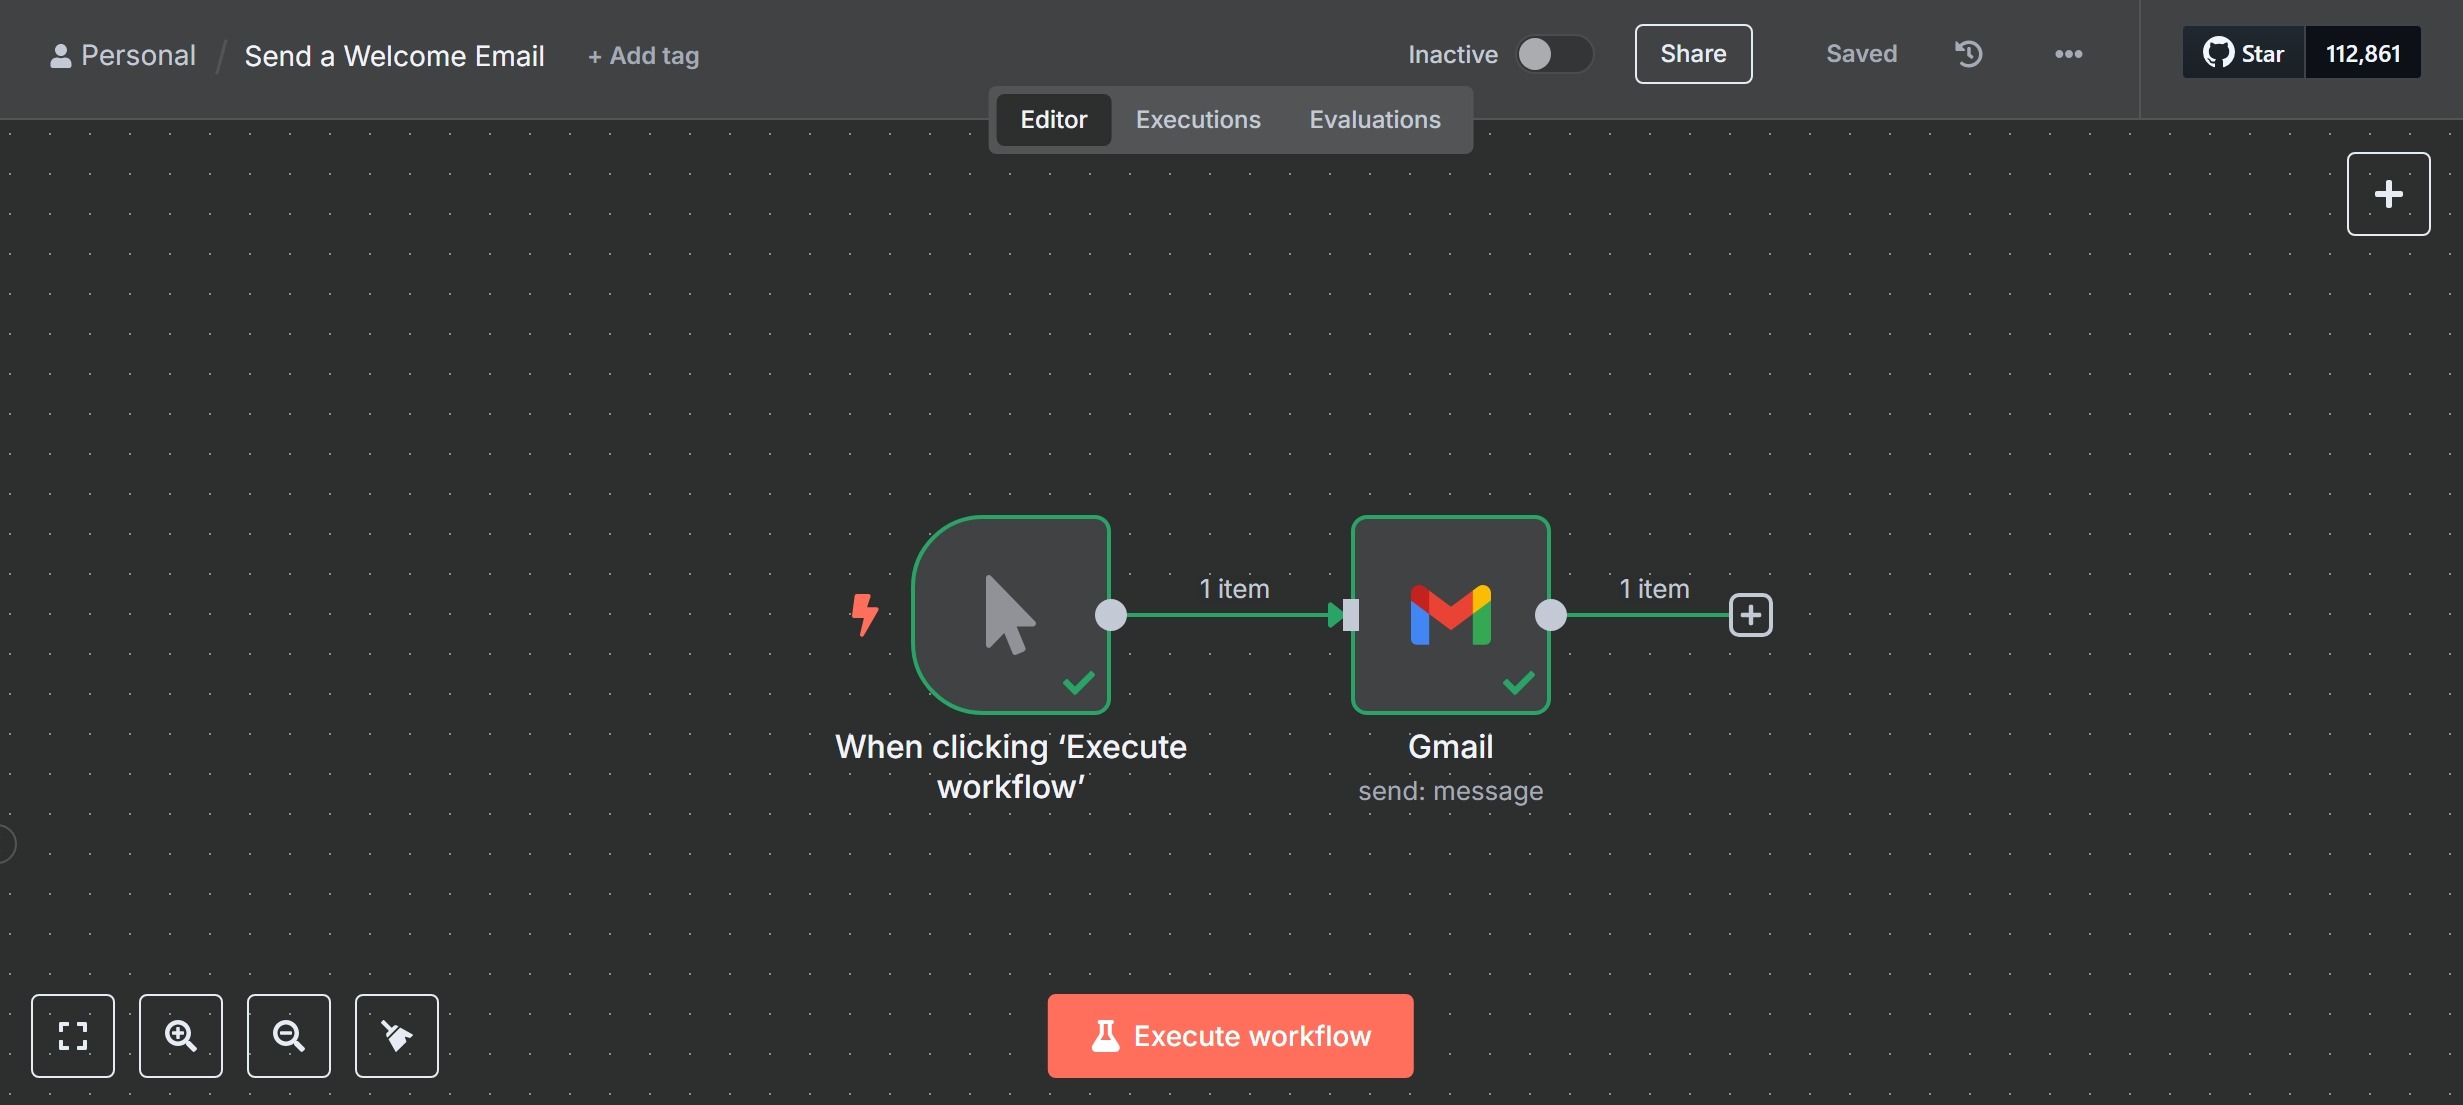
🔹 Workflow Overview
Below is the workflow we will build, connecting a Manual Trigger node to a Gmail node to send an email:
🔹 Step 1: Add a Manual Trigger
- Open your n8n editor → Click “+ Workflow” to create a new workflow.
- Search for Manual Trigger and add it to the canvas.
- This node acts like the start button for your workflow, letting you trigger it manually.
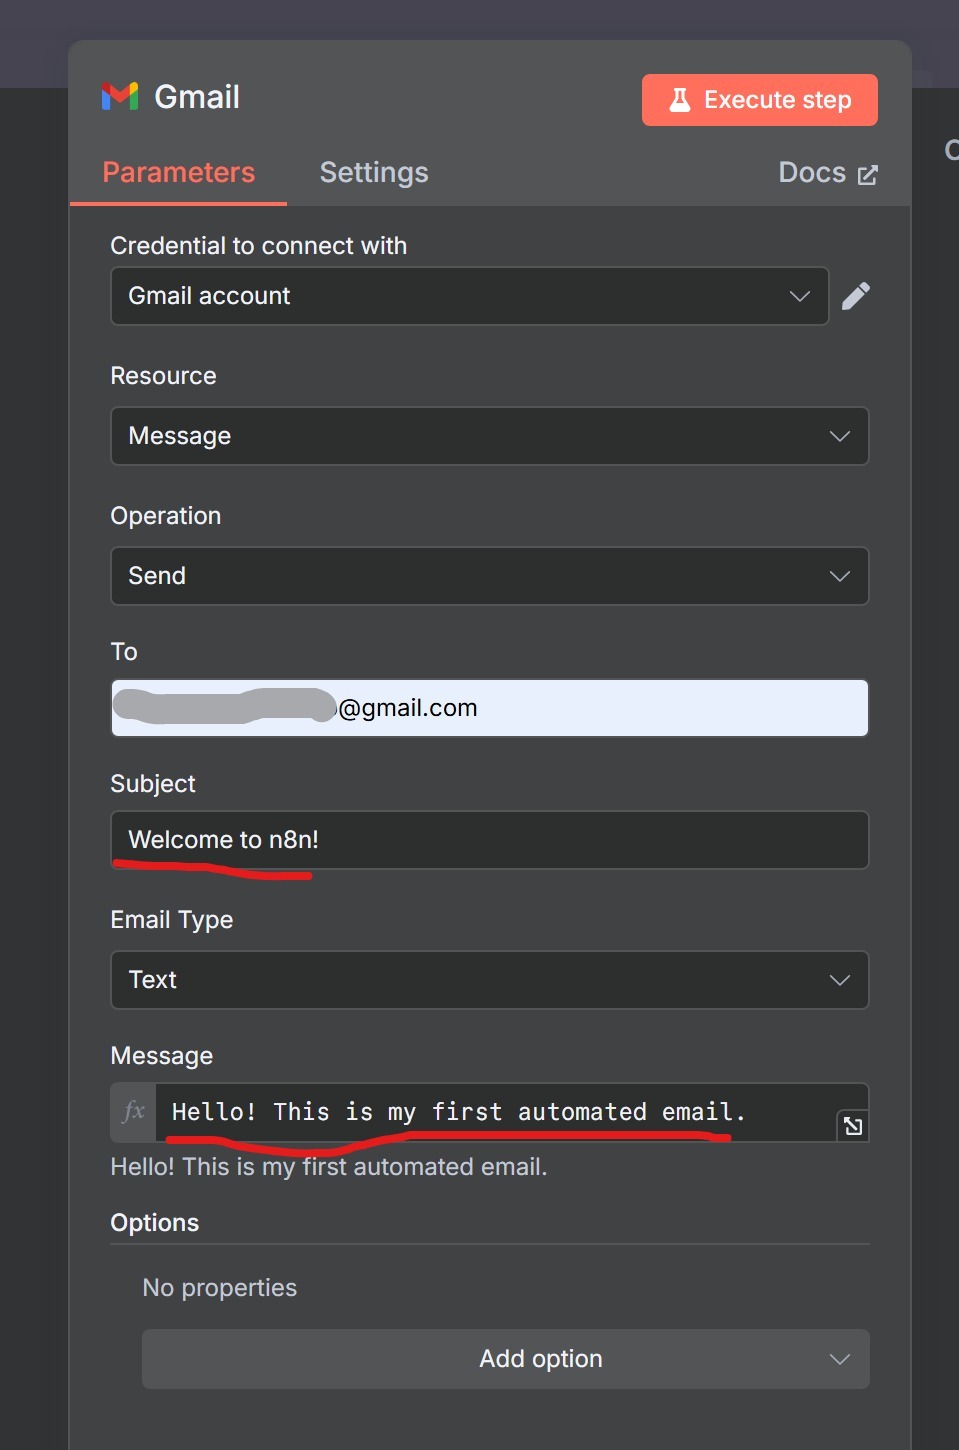
🔹 Step 2: Add and Configure the Gmail Node
- Click the “+” button after the Manual Trigger to add the next node.
- Search for Gmail, then choose your connected Gmail account.
- Configure your Gmail node:
- To: your-email@example.com
- Subject: Welcome to n8n!
- Body: Hello! This is my first automated email.
Here’s what the Gmail node configuration looks like in n8n:
🔹 Step 3: Test Your Workflow
- Click “Execute Workflow” in the top right.
- Check your email inbox – you should see the message!
Below is what your inbox should look like after a successful execution:

✅ What Just Happened?
- ✔️ You manually triggered the workflow (like pressing a button).
- ✔️ The Gmail node performed its action (sending your message).
- ✔️ The workflow executed successfully from start to finish! Ready to try more? Explore Part 2: Nodes & Node Types of our Key Concepts series.
🔎 Try It Yourself
- 🔹 Change the email text and send it again.
- 🔹 Add a second Email node to send to another address simultaneously.
- 🔹 Try adding a Delay node before the Email to schedule the send — learn how in our n8n Scheduling Tutorial.
Next Steps
🔜 Part 2: Nodes & Node Types – Learn about HTTP Requests, IF conditions, and Merge nodes.
💡 Experiment: Replace Manual Trigger with a Schedule Trigger to automate the email daily.
Need Help?
- Join the n8n Community for support.
- Check the official docs.
- Or read our Ultimate Guide to n8n for a deep dive.
What would you like to automate first? Let me know in the comments! 🚀